Friday, March 25, 2011

A New Floor


So the last two work days were very productive, thanks mostly to my brother-in-law, Jake. The first day we broke down some of the scrap material and assesed what we had to work with. At the end of the day I patched some holes in the floor with fiberglass.
This hole is about 1 1/2" wide
This was a nice long tear. It's rock solid now.
Although slightly hazardous to your health, fiberglass cloth and epoxy is pretty easy to work with and did a nice job. I guess we will see if the patches break when transported, but they are pretty solid right now.


Look ma, no bracing!

I've found a bunch of other holes and tears that I'm going to continue to cover with the fiberglass until I run out. I'm not sure how crazy I will go as there are a ton of little screw holes. I'm sure Jake will tell me to cover them all, and he's right. I've found from the rot and water damage that all it takes is a little hole to cause plenty of damage. Big holes also cause damage: When we took off more paneling in the bathroom there was a whole brace missing. Now, there was another one right next to it, but still it was all gone. So, more rebracing is needed.
The main project was bracing the floor and putting in new 'joists'.  It went really well and I'm really happy with the result. What helped the most was attaching the joists to the actual frame of the trailer, something that the PO hadn't done. I'm not really sure why, because it was very simple and the whole trailer feels more stable.
Carriage bolt from the top...
and the bottom.

We put about 3 or 4 in every frame piece, so I think it should be good. I know I said it before, but it really made a huge difference. Jake helped with the logisitics so we made lap joints and notches used a plethora of pocket screws. The (almost) finished product:
Jake points.
We ran out of 2x4s and carriage bolts, but only have about three more pieces to cut. I'm still hoping I don't regret not taking out the kichtenette, as I know the floor is in bad shape underneath it. Oh well, not enough time right now.

So we started putting together the plywood puzzle of the floor and think we have it figured out. So after I get ther est of the lumber and more carriage bolts, the plywood will get screwed down and ready for the vinyl tile we picked out.
Still have to cut one piece of plywood, but looking good.

So, I feel pretty good about the progress we made. The deadline for having the project finished is the end of April, so that is a little over a month. I'll save time by not bothering with the plumbing and stuff, so I don't think it will be a problem.

I'm going to work more next week, hopefully the forecast is wrong (highs in the 30's). Either that or I will try to get the furnace working, I haven't even tried, although the fan works. Anyway, thanks for looking.

Sunday, March 20, 2011

Demolition, Day Two

Day two of demolition proved to be just as eventful as day one. I think this actually happened last Tuesday, but I'm just getting around to posting about it. Two main things removed were the storage area in the front left and the bathroom appliances and floor.
   

<>
<>
 
Check out the water damage along the seams!
 
I was really debating whether or not to remove the tub, sink and toilet, but I'm sure glad I did. There was yet again much rot underneath the floor, even though the floor had been replaced.  

Composted floor hiding beneath a wet floor

In the lower picture you can also see some of the plumbing system. I'm assuming it's in good shape because it's PVC and the water lines are a hard kind of flex tube. I'm not really planning on using them this summer, so I'll just leave them alone for right now. I'm tossing the tub and the sink (it was cracked) but am saving the toilet for right now. We won't be using it this summer, so I might just put it back in or just cover up the black water tank with some wood.

I had to throw out some soggy plywood from the bathroom, there was no way it was going to dry out and be usuable. I also ripped down one side of paneling in the bathroom and it turned out to be masonite with wall paper over it. It was pretty substantial and in good enough shape to make me leave the other two walls up.

Finally, I started working on reinforcing the floor by running 2x4s along the metal frame. As it was, they only ran perpendicular to it, causing some parts of the floor to be very unsupported. I'm still looking into if I should bolt these to the frame, but haven't found any answers. That's originally how they were and I think it would stabilze the whole trailer some more, but it might be a hassle and it would be another hole in the aluminum.

She must be lighter now!
Well, hopefully I will get quite a bit of work done on the floor and frame this week. My brother-in-law thinks it will go pretty fast, so let's hope he's right. Well, that's all for right now. Thanks for looking.

View from the door. Put some pans in to see if I
can identify where the leak is exactly.

Sunday, March 13, 2011

The First Day

Hello there! Here it is:


We (my wife and I) purchased this trailer about a month ago. It is our first step into the camper world and we are very excited. We purchased this camper with the intent of living it for the summer (stationary) and then maybe taking it on the road. We knew we couldn't afford anything too extravagant and this fit the bill.


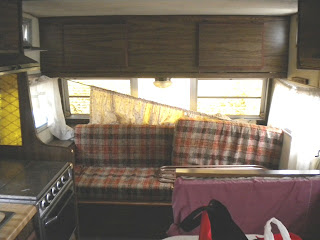
Although not totally trashed and usless, you can see the camper was not in good condition. A quick rundown, the PO (previous owner) said the only leak was in the bathroom, coming through the vent. This, of course, was not the case although, in their defense, it was the only visible leak. It has pretty new tires, a new subfloor and joists underneath. Lights and outlets work. Cosmetically, the PO removed the original turn/brake lights and replaced them. The aluminum is in pretty good conidion, not too many scuffs, etc. The stone guard is original, it looks like, but covered with moss. All the windows minus one work and most of the screens are in pretty good shape.


Original fridge, stove, heater, sink and tub (replaced toilet, I believe). I haven't hooked up the propane, but the blower on the heater works. It didn't come with a water tank, water heater, or water pump.

Water damage:

We got it towed to our brother-in-law's house in order to take advantage of his know how and his tools. Yesterday I took the first good look at it and started figuring out what I was going to do to get it in shape to use for the summer.

When I first looked at the trailer in January there was a bunch of stuff in it (the PO was using it as a shed, basically) so I couldn't get a good look at the inside, other than to know it would work for what we needed. He told us about the leak and we settled on a price (under $700). At this point I was just thinking, fix the leak and then it will be good to go for the summer. But now...


So yeah, things got a little crazy. I think it started with me taking off a shelf a PO had added and ended with pretty thorough gutting of the inside. It's pretty easy to take one thing off and then that leads to another, and another. In retrospect, I'm glad it's as bare as it is and may actually take out the kitchen area, depending on if the fridge works or not.

After we were done...

This was mostly an exploratory sugery. There was evidence of some water damage underneath the long front window on both sides, so I started ripping to see how bad it was. Then we wanted to see what the floor looked like. A few screws later confirmed the PO had done a nice job of getting rid of the old floor and laying a new one. A few more 2x4s will get rid of some sags. I also decided to take out the dining nook because the goal of this camper is to suit two people, not six as originally intended. With that in mind I also got rid of the fold down bed and will convert that area to some shelving. I must say, the camper seems about twice as big with all this stuff out of the way.  

The front bed/couch area was taken out because there was still the original floor under that section and it was decomposing. Have I mentioned that the camper smelled really bad? It did. And it does still, but hopefully once all the offending wood is replaced and it has had a chance to air out. I also discovered some holes in the floor, some meant to be there, some most certainly not. There was an abundance of walnut shells and other seed pieces that gave away the former inhabitants of the camper. You can see in these pictures the propane line for the water heater, the inlet for a water tank, electrical lines and an access door. At the seam in the front was an original 2x4 that was totall rotted. The problem with that was the seam was screwed (or nailed) to that, so without the 2x4 the seam had no chance of sealing.


So ends the first post. A bit of discovery and great thoughts for what this camper could be!